


So I’m a lazy old git that likes shortcuts and that includes running programs, what I mean by this is that I have been playing a bit of Elite Dangerous of late but when I start the game it’s not just the program Elite Dangerous that I run, I actually have four programs that I use. Of course there is Elite Dangerous but I also use Voice Attack, Elite Dangerous Market Connector and a game recorder called Action!. Now I don’t want to have to click 4 buttons to start these four programs, so instead I use a batch file to start them all with a single click that runs all four of them in a single go. But there’s more, two of them require that I click on the yes button of the User Account Control, more button pressing. I’ve already said I’m too lazy for that, so I use the Task Scheduler to bypass the need to having to press all of those buttons. Finally I also want to have an icon in the start window to start all of these to keep the desktop tidy.
Phew considering I said I was a lazy old git, let me tell you this is a lot of work to do all of this. Some of it I already knew how to do it, others threw up some problems like you cannot link a .bat file from start, it has to be a .exe file, so I had to figure a way around that.
So I want to show you how I have achieved this, tell you of the problems I came up against, not just the start issue. I think some of you may like to know how to do it, or just how to do part of it like how to bypass the UAC for a single program while keeping it active for others as the safety feature it is meant to be.
So where to start, let’s start with the batch file, some of you may be asking what a batch file is, well it’s a computer file containing a list of instructions to be carried out in turn. In my case it’s being used to run four programs one after the other.
To do all of these things I’m just going to use software that you will probably already have on your computer. For the batch file all you need is notepad personally I use notepad++ but just plain notepad will do.
The first line that you have to enter for the creation of the batch file is:
Code: Select all
@echo off Next we need to tell the file what it is going to do for us this it is to run a program, for this we use the line:
Code: Select all
start "EDLaunch" "M:\Games\EDLaunch\EDLaunch.exe"[ external image ]
You finish of the batch file with the command exit, so enter a new line and just type:
Code: Select all
Exit[ external image ]
Now you have to save the file. To do this in notepad select the save as command below where you enter the File name, you need to change the save as file type to all files (*.*) and enter a filename and at the end of the filename add .bat, I’m just going to use test.bat this tells windows it’s a batch file.
[ external image ]
Save where you want to save the file, this could be your desktop but this is where the file will sit so I would pick somewhere else, I’m saving it in the folder where I am keeping these instructions. We are actually going to create a link to this file to launch it from, as we want to be able to change the icon for the file make it look better, and you can’t change the icon for a batch file. Not just that, I will be showing you how to add a link to the start menu and you can’t do that with a normal link. So anyway that is a batch file created, right now it is only a useless file as it only launches a single program, kind of a waste of time really but I’m going to add others to it. Right now let’s just leave it as is and create a link to it. To create a link is pretty easy all you have to do is right click on the file, go to send to and click on Desktop (create shortcut) and hey presto you have a link to the batch file on your desktop, which is fine if that’s where you want the shortcut but I don’t want it there though, I want it in start and you can’t put a link to a batch file in start, so to do this I’m going to use the CMD prompt to create a link.
So how do you go about doing this? You need to click on your start button, and find the windows system folder, in that folder right click on the command prompt icon and go more->open file location, now you want to copy the command prompt shortcut that is there, right click on it and click on copy now. I’m working form a single folder it’s where I saved the batch file earlier, so I have now went there and used the paste command to make a copy of the command prompt link
[ external image ]
So now we have a shortcut to the command prompt, but all that does is open up the command prompt, we want it to open up and run our batch file instead. First of I would say rename your link to the command prompt to something more appropriate, as it is going to be used to open up the and run the batch file and not the command prompt for me my batch file is going to be used to run programs related to Elite Dangerous, so I’m going to call it Elite Launch. You can call it whatever you want, remember, the name can always be changed at a later date. So to make it run our batch file we need to change some of its properties. So once again we open the properties of the newly named command prompt shortcut, we do this by right clicking on it and selecting properties from the dropdown list. When the properties window is open the target box will be blue and contain the words %windir%\system32\cmd.exe, this is where the command prompt program is, we want to keep this line and we want to add some more information onto it, as what we want is for the command prompt to run and execute our batch program. To do this at the end we add:
Code: Select all
/C[ external image ]
You now enter this address after the /C you entered in the target box a short while ago.
Now in my target box I have
Code: Select all
%windir%\system32\cmd.exe /C E:\Documents\batch runningCode: Select all
\testCode: Select all
%windir%\system32\cmd.exe /C E:\Documents\batch running\testNow I have done this on purpose, as when I did this the first time it wouldn’t work as there is a mistake, it took me a little while to work it out, when I created a folder just like here I used two words and I included a space between those two words and due to this it will not work, a simple work around is to rename the folder and use an underscore in place of the space so now I have called the folder batch_running and edited my line so that it now reads:
Code: Select all
%windir%\system32\cmd.exe /C E:\Documents\batch_running\testSo now we have a CMD prompt shortcut that launches a program, but it still looks like the icon for the command prompt, which is not good. So let’s change the icon. You can find many icons on the internet just google free icons if you need one, I’m just going to use the same icon that is used for Elite Dangerous.
Now to do this once again open the properties window for the CMD prompt or should I say the our new batch file launcher, under the shortcut tab there is three buttons, we want the middle button labelled change icon, click on it there will just be a single icon in the select an icon from the list below box, we don’t want that as it is the command prompt icon we want to use our own icon. So if you click on the browse button you can head over to the folder where you have the icon you want to use. I’m heading to where the Elite Dangerous game is installed, as I’m going to use that icon, all I have to do is select the games .exe file and that will use that icon I want, you just have to select the one you want to use. Once you have your icon selected just click ok twice and that should have changed the CMD icon to your shiny new icon.
Next we want to put the shortcut that runs our batch file onto the start menu window, you just can’t drag it there as that won’t work, no all you need to do is once again right click on it and select pin to start. If this had been a normal shortcut that option would not have been available to us. As you can see.
[ external image ]
[ external image ]
So now we have an icon in the start menu that when we click on it, it will run our batch file which in turn will run our software that we wanted to run, but we are not finished yet.
Right at the start I said I wanted to use a batch file to run four different programs, so far it only runs a single program. The other three on my list were Voice Command, Elite Dangerous Market Connector and the game recorder called Action!. The Elite Dangerous Market Connector is the easiest as this program just needs to be run the same way as Elite itself did, I just need to add the line:
Code: Select all
start "EDMarketConnector" "C:\Program Files (x86)\EDMarketConnector\EDMarketConnector.exe"[ external image ]
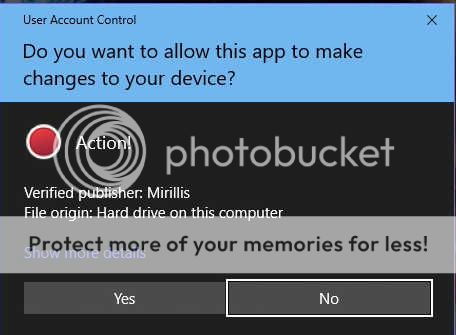
Now the other two are a little bit different, as they require permission from the user account control to launch, and I want to bypass this and to do this I’m going to use the Task Scheduler. To open the Task Scheduler click on the start button and just type in task scheduler and click enter, the app will launch.
[ external image ]
The task Scheduler can look pretty intimidating but I’ll show you what you need to do. The next program I will do is voice attack. The first thing that needs to be done using the Task Scheduler, in the actions pane on the right hand side you want to left click on Create Task…
[ external image ]
This opens up the create task window, this is what we use to bypass the UAC meaning we won’t need to press yes to launch the program anymore. Now in the create task under the General tab we first want to give our task a name, as I’m doing this for voice attack that’s what I’m going to call it, but you can call it whatever you want, though I would name it after whatever program you are doing this for. Next you can give the task a description, this it is not essential and doesn’t do anything other than tell you what the task is being used for, you can skip doing this. The other thing to make sure that is done on this tab, is make sure that the tick box for Run with highest privileges is ticked, as this is what gives the software the needed rights to get passed the UAC, I also like to change the configure for: to windows 10 as that is what I’m using, but if the software is meant for say windows 7 then I would use that instead.
[ external image ]
Next we move onto the Actions tab. At the bottom of the window click on the New… button, now there are a couple of ways of doing this but I’m going to show how I do it, I know there is another maybe easier way to do it but I have had problems with that way, so I do it this way instead.
So for the new action we want to have Start a program as our Action, as that is what we are for doing. In the settings in the box under Program/script you want to enter:
Code: Select all
%windir%\System32\cmd.exeCode: Select all
/c start "Voice Attack" "K:\VoiceAttack\VoiceAttack.exe"[ external image ]
Click on ok and the actions tab should now look like this.
[ external image ]
That is it, that’s all there is too it, now just click on ok to create the task but we also need to tell the batch file about it, so back to the batch file we go. This time is a little bit different from the other two we set up previously, this time the line goes:
Code: Select all
start "VoiceAttack" C:\Windows\System32\schtasks.exe /run /tn "Voice Attack"Now I have one more to show you, and that’s how to setup the screen recorder Action!. This is a little bit different. The task scheduler is setup the same but it needs something else added, as when the software is run using the batch file, it will crash and this is because the command prompt itself has to be run from the directory that the program is in. So if you were to setup a program like this and it would not start or it would start then crash this is what you need to try first. This time when creating the task in the actions tab we click on the edit button, in the edit action window that opens there is the command Start in (optional): you enter the path to where the program is on your computer, for me for Action! It was:
Code: Select all
C:\Program Files (x86)\Mirillis\Action!\This tells the command line where to run the program from and it stops the program from crashing, this gave me a headache the first time when it happened to me, trying to figure this out but I got there in the end.
All we need to do now is go back to the batch file in notepad and add the start line for Action!. For me this is:
Code: Select all
start "Action" C:\Windows\System32\schtasks.exe /run /tn "Action"[ external image ]
You can now save all of your hard work and close everything. Now I can launch all four programs with a single click of the icon in the start menu, and I don’t get bothered with the UAC any more either. I use this for other programs, I just used the ones above as it showed a few different issues I had to get around and how I did eventually get around them.


")


![[ external image ]](http://i214.photobucket.com/albums/cc301/felters_pix/Batch%20CMD%20and%20Tasks/th_diag%201_zpsujrwxziz.jpg)
![[ external image ]](http://i214.photobucket.com/albums/cc301/felters_pix/Batch%20CMD%20and%20Tasks/th_diag%202.5_zpsyu7urayv.jpg)
![[ external image ]](http://i214.photobucket.com/albums/cc301/felters_pix/Batch%20CMD%20and%20Tasks/th_diag%202_zpsflga7v4k.jpg)
![[ external image ]](http://i214.photobucket.com/albums/cc301/felters_pix/Batch%20CMD%20and%20Tasks/th_diag%203_zpsqnfpwwy4.jpg)
![[ external image ]](http://i214.photobucket.com/albums/cc301/felters_pix/Batch%20CMD%20and%20Tasks/th_diag%203.5_zpsuuiaoioj.jpg)
![[ external image ]](http://i214.photobucket.com/albums/cc301/felters_pix/Batch%20CMD%20and%20Tasks/th_diag%203.6_zpspyxgo59k.jpg)
![[ external image ]](http://i214.photobucket.com/albums/cc301/felters_pix/Batch%20CMD%20and%20Tasks/th_diag%204_zps5gu2edj0.jpg)
![[ external image ]](http://i214.photobucket.com/albums/cc301/felters_pix/Batch%20CMD%20and%20Tasks/th_diag%205_zpsq9cqt5fg.jpg)
![[ external image ]](http://i214.photobucket.com/albums/cc301/felters_pix/Batch%20CMD%20and%20Tasks/th_diag%205.1_zpstyu6wjee.jpg)
![[ external image ]](http://i214.photobucket.com/albums/cc301/felters_pix/Batch%20CMD%20and%20Tasks/th_diag%206_zpsqef34dsu.jpg)
![[ external image ]](http://i214.photobucket.com/albums/cc301/felters_pix/Batch%20CMD%20and%20Tasks/th_diag%207_zpse1solimn.jpg)
![[ external image ]](http://i214.photobucket.com/albums/cc301/felters_pix/Batch%20CMD%20and%20Tasks/th_diag%208_zps50lrycs5.jpg)
![[ external image ]](http://i214.photobucket.com/albums/cc301/felters_pix/Batch%20CMD%20and%20Tasks/th_diag%209_zps2y4khcjx.jpg)
![[ external image ]](http://i214.photobucket.com/albums/cc301/felters_pix/Batch%20CMD%20and%20Tasks/th_diag%2010_zps0tt8zupd.jpg)
![[ external image ]](http://i214.photobucket.com/albums/cc301/felters_pix/Batch%20CMD%20and%20Tasks/th_diag%2011_zpszqca9sty.jpg)
![[ external image ]](http://i214.photobucket.com/albums/cc301/felters_pix/Batch%20CMD%20and%20Tasks/th_diag%2012_zpsozb2eoa1.jpg)